Adding a contact form
Put a working contact form on your site and read the messages visitors send.
Add the form
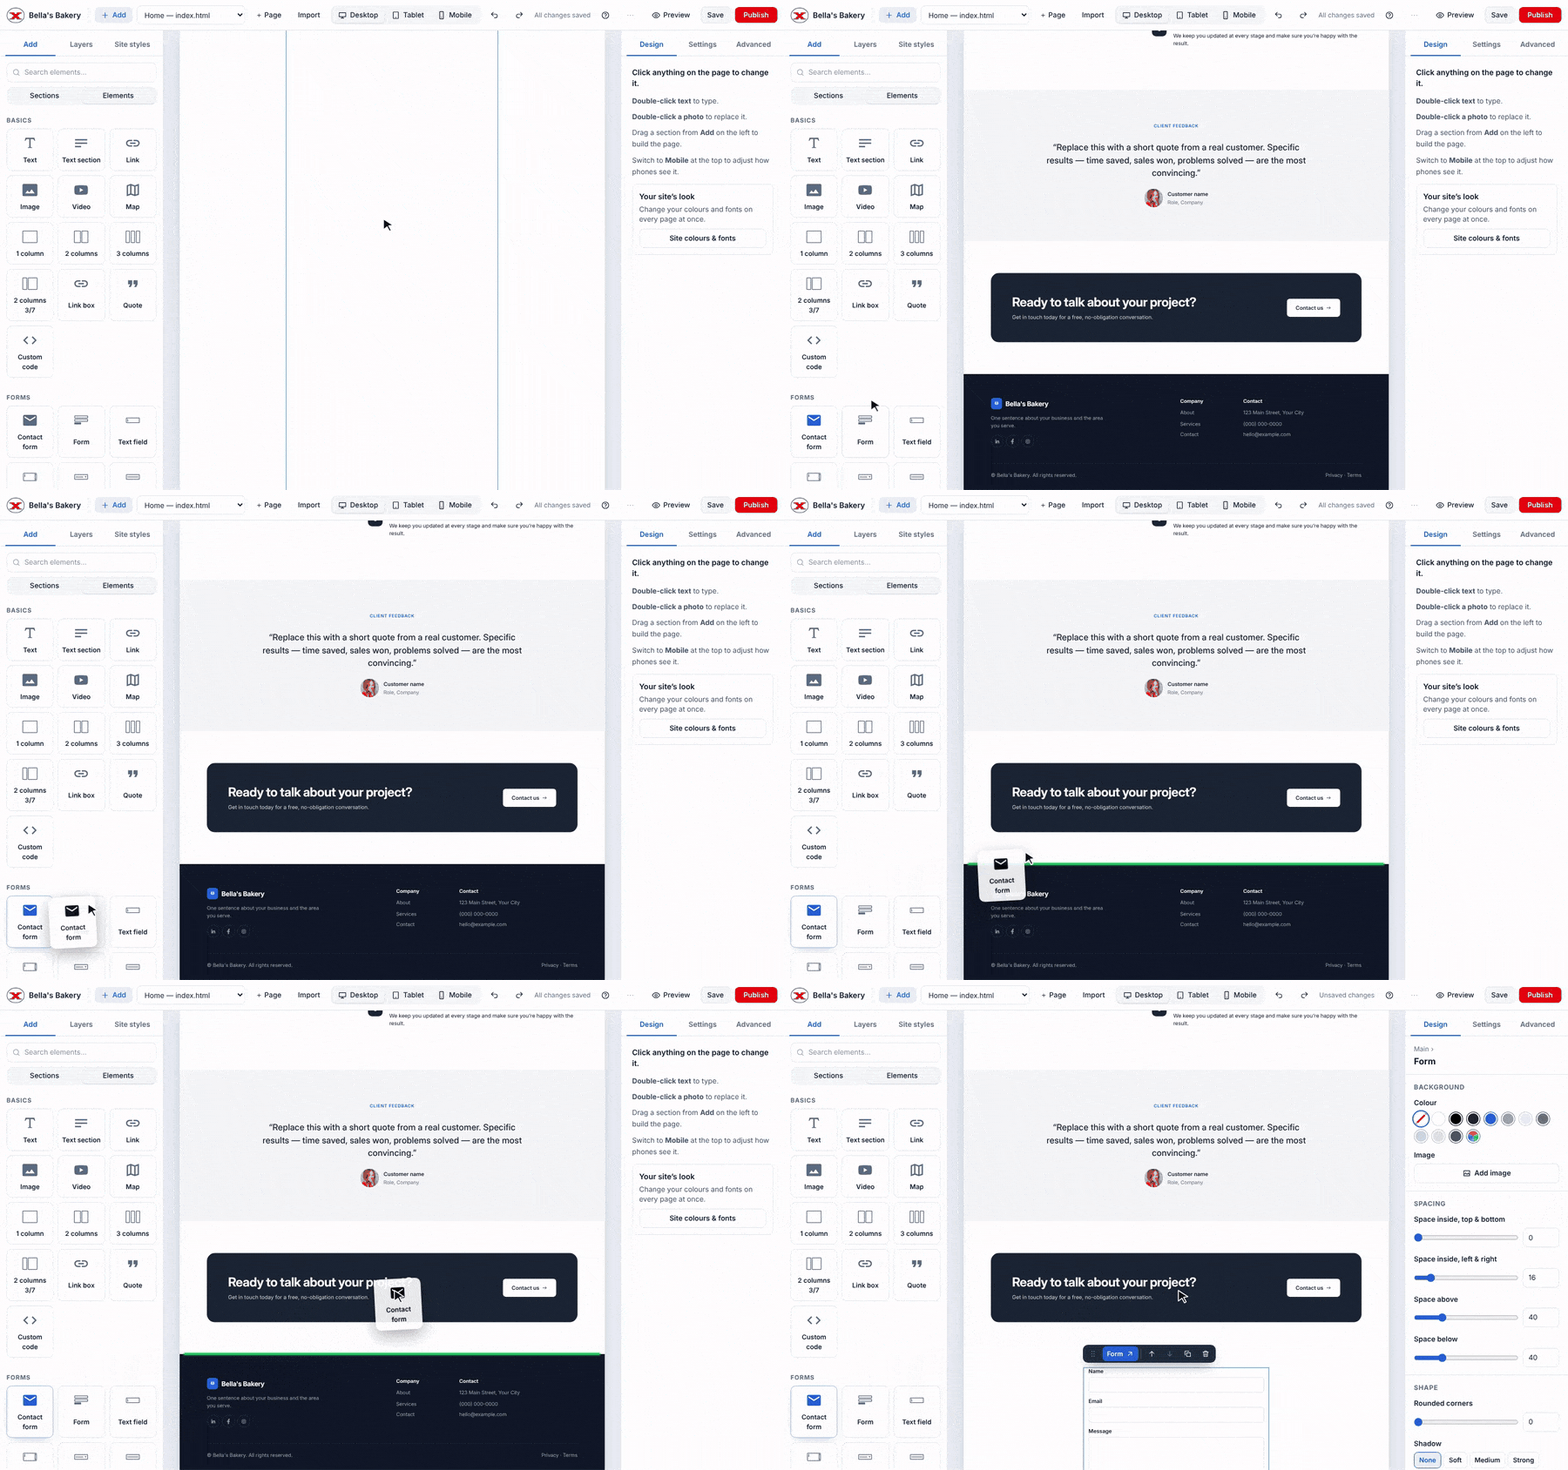
- In the editor, open Add on the left and switch to Elements.
- Under Forms, drag Contact form onto your page (or click it to add it below the selected section).
- Change the heading, labels and button text if you like, then Publish.
That's all — the form is already connected. The Business starter template's contact page is connected too.
What visitors see
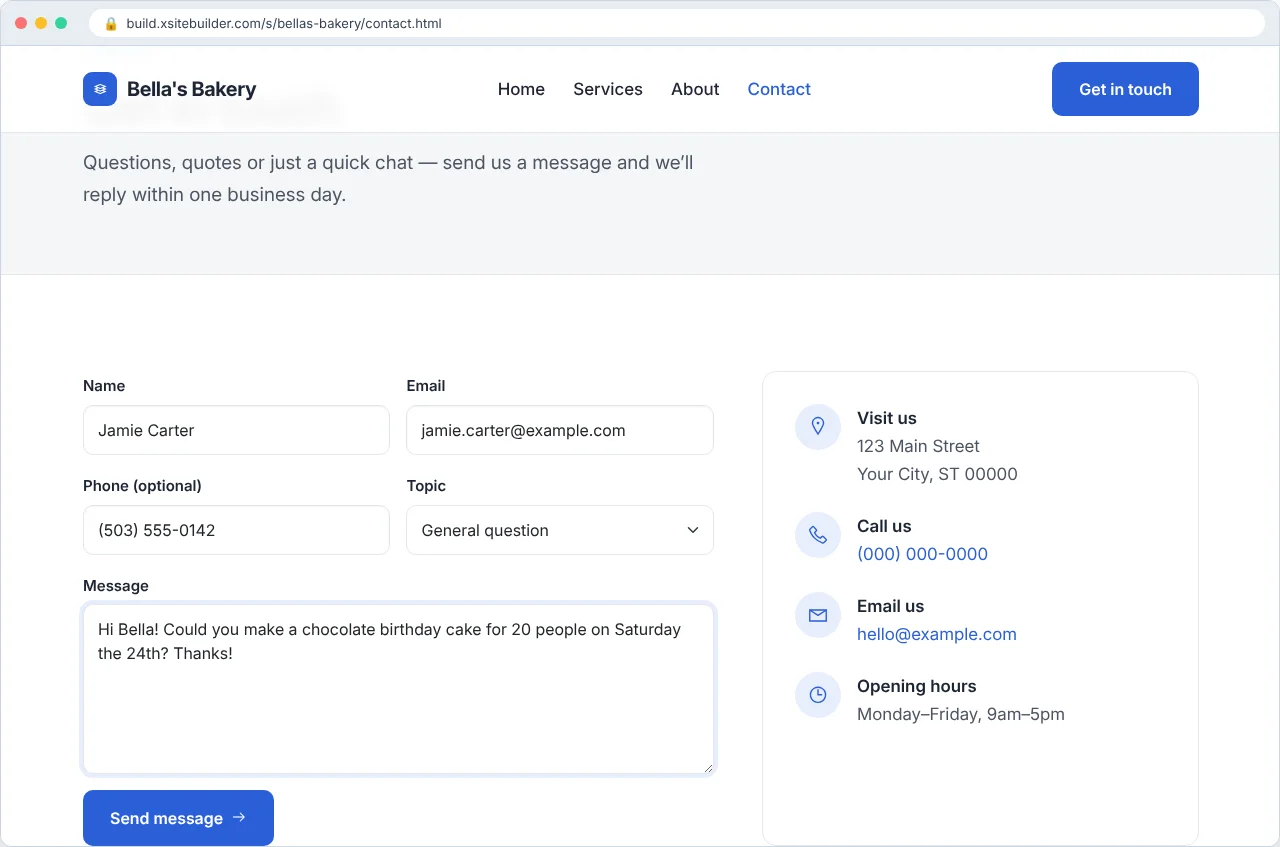
After sending, they see a thank-you message (or your own thank-you page — see below).
Reading messages
Messages appear on the site's page (Manage) under Form messages, newest first:
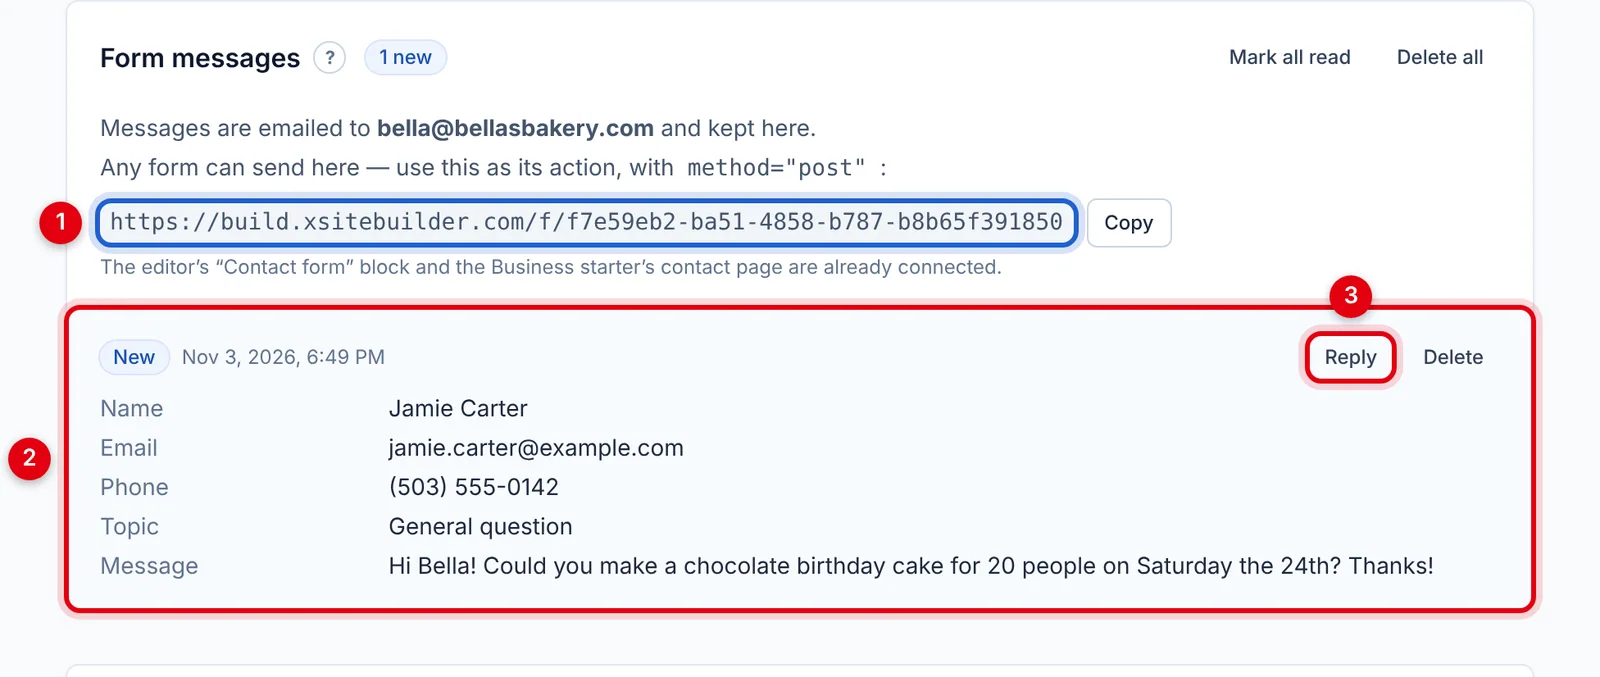
- The form address — use it for your own forms.
- A message, marked New until you click Mark all read.
- Reply answers by email. Delete removes a message.
Every message is also emailed to you:
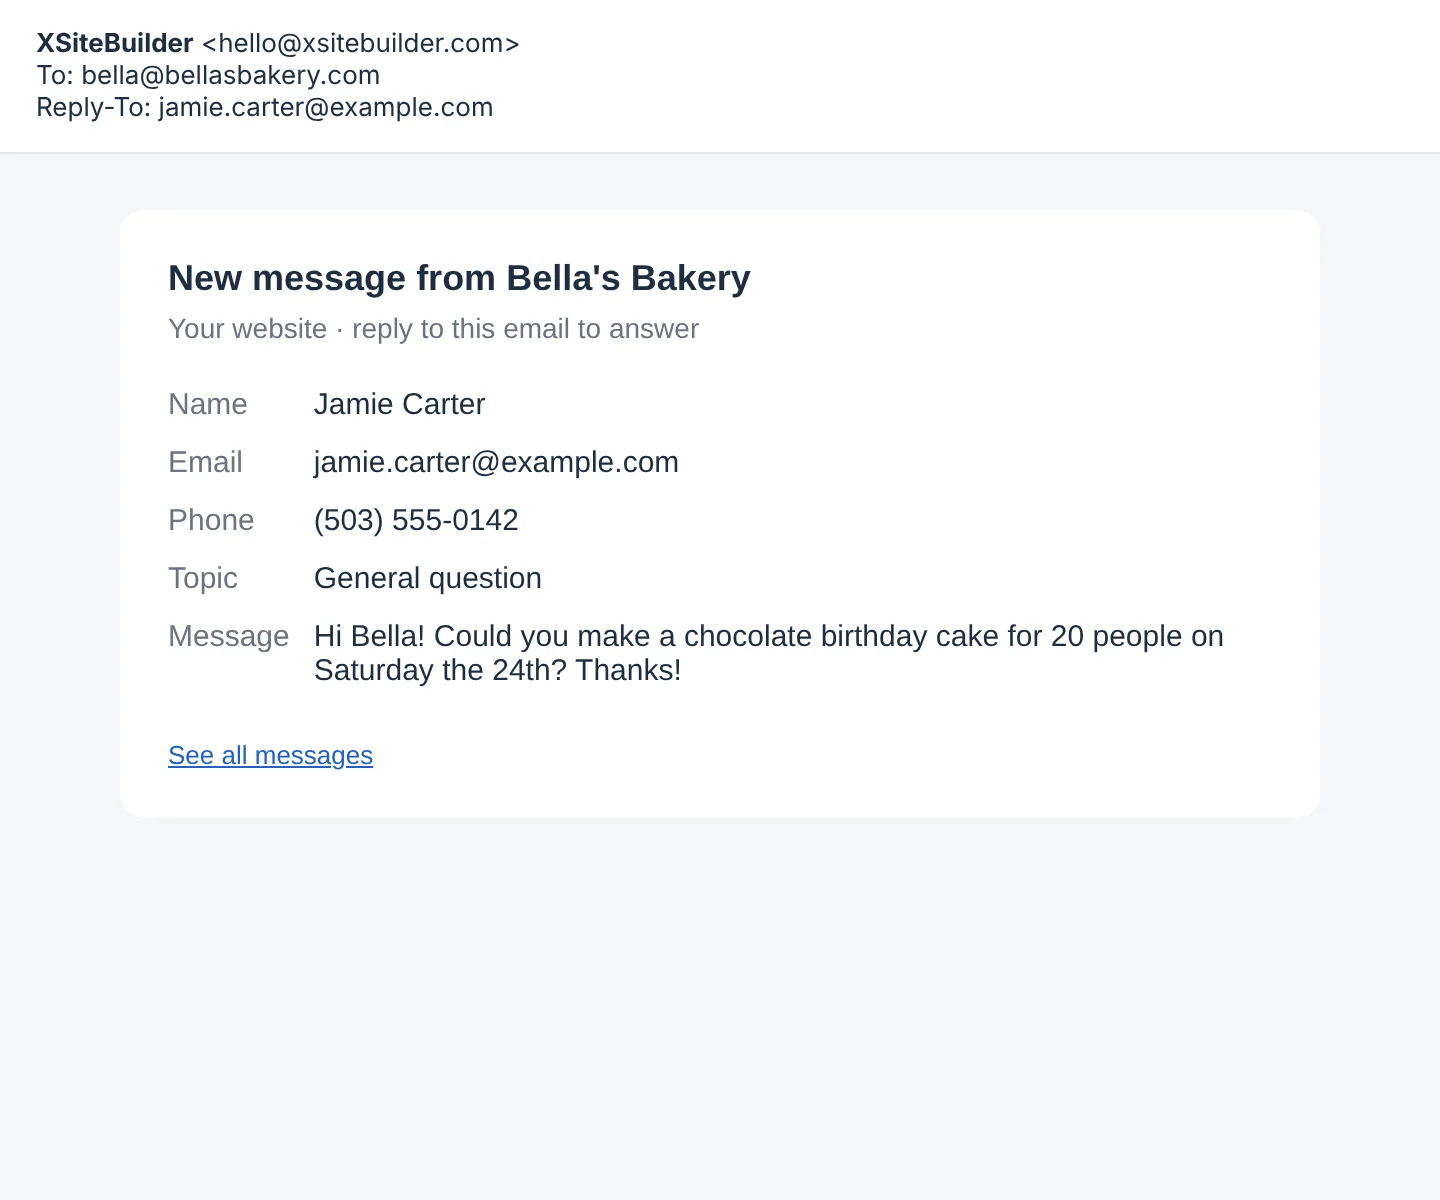
To choose who gets these emails, see Who receives form emails.
Using your own form design
Any form on your site can send messages here. Select the form, open Settings on the right and set:
- Action — the address shown under Form messages (click Copy next to it).
- Method —
POST.
Give every field a name (e.g. name, email, phone, message) — that's the label you'll see in the message. A field called email becomes the reply-to address.
Optional extras
- Your own thank-you page: add a hidden field named
_redirectwith a page on your site as its value, e.g.thanks.html. - Extra spam protection: add a hidden, empty field named
_gotcha. People can't see it, but spam robots fill it in and their messages are ignored. (The Contact form block already has one.)
Each visitor can send up to 5 messages every 10 minutes, which stops floods of spam.
Didn’t find what you need? Contact support.