A tour of your dashboard
The Sites page, a site's own page, and Workspace settings — what each one is for.
After signing in you land on your workspace's Sites page.
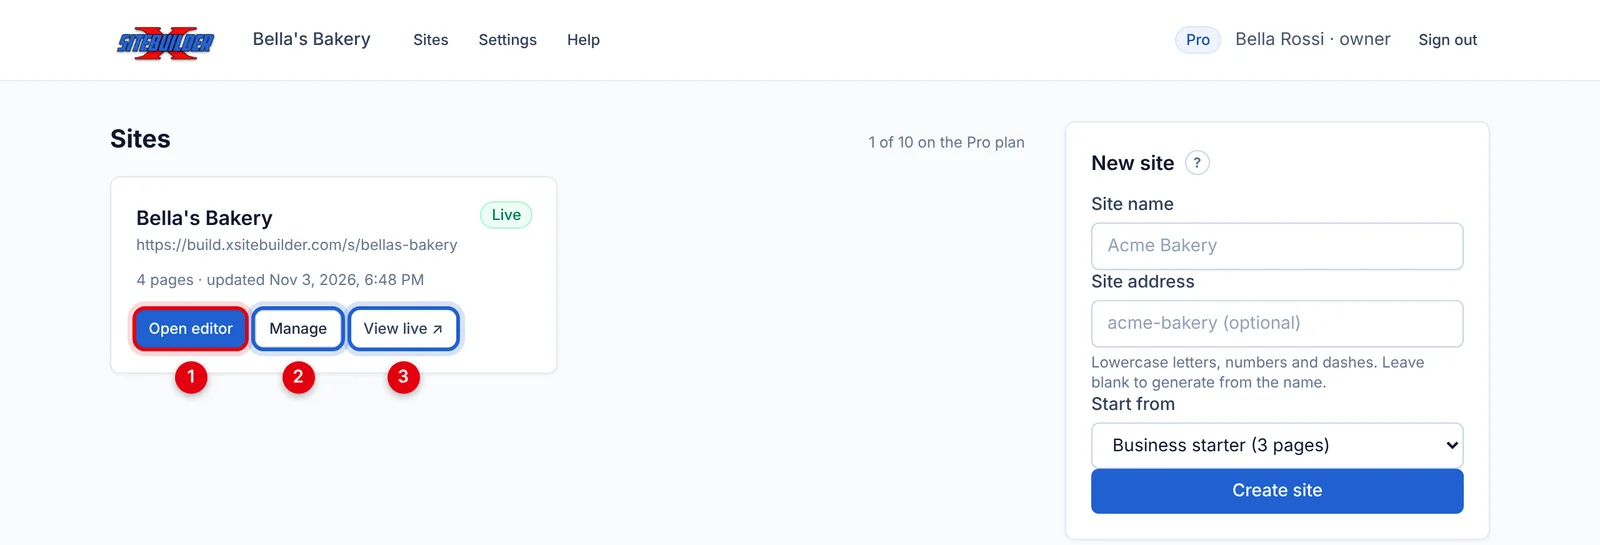
The bar along the top is always there: the logo (back to your sites), your workspace name (click it to switch workspaces), Sites, Settings, Help, your plan, your name and Sign out.
The Sites page
Each site has a card with three buttons:
- Open editor — start editing pages.
- Manage — the site's own page (below).
- View live ↗ — the published site, once it's live.
On the right you create new sites: from a template, with AI (optional), or by copying a website.
A site's page ("Manage")
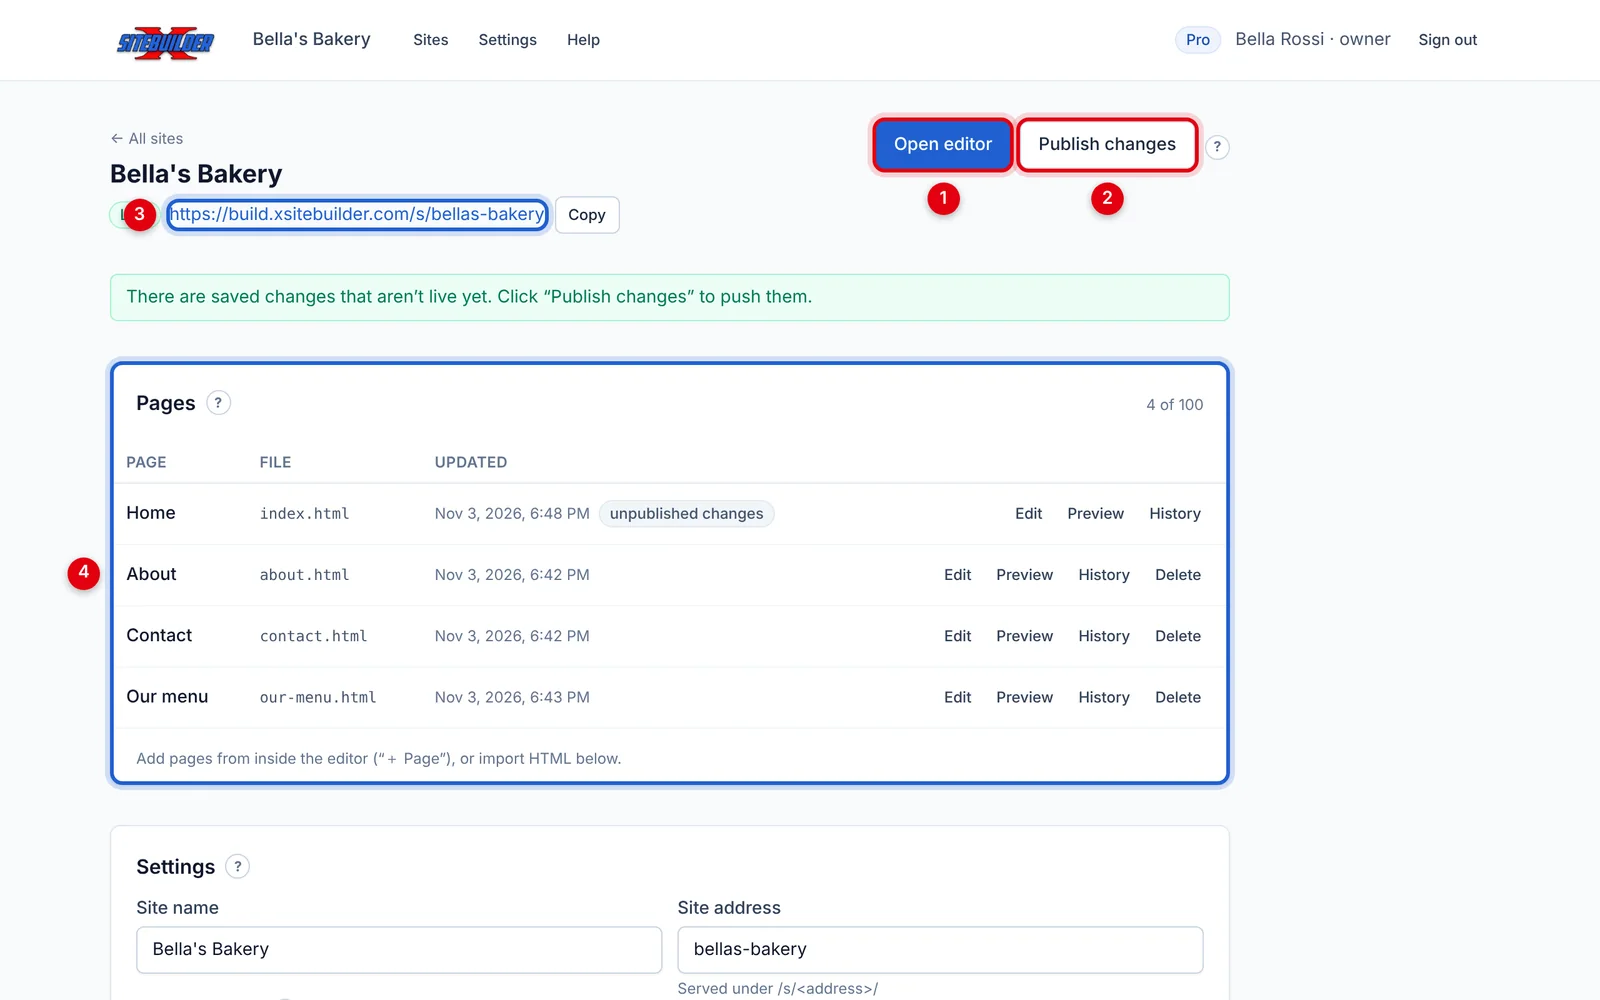
- Open editor.
- Publish site / Publish changes — make your saved changes visible to visitors.
- The site's web address — click Copy to copy it.
- Pages — every page, with Edit, Preview, History and Delete.
Further down the same page: Settings (name, address, custom domain, form emails), Form messages, Import HTML, Copy a website, Export and the Danger zone.
Workspace settings
Click Settings in the top bar for your workspace name, your team, your plan and billing, the email server for contact forms and the optional AI connection.
Look out for the small ? buttons next to headings — each one opens the matching help article in a new tab.
Didn’t find what you need? Contact support.